Applying for an Egypt e-Visa

I briefly visited Cairo for a long layover last week on trip through the Mediterranean and the Middle East. My 16-hour stay in Egypt’s capital was more than enough for a tour of the Great Pyramids of Giza, allowing me to check off a major bucket list item while passing through the city.
Canadian travellers are required to obtain an e-Visa to enter Egypt, and despite the short duration of my stay in the country, I was no exception and went through the process to obtain an e-Visa a few weeks before my visit.
In this post, I’ll walk you through the very straightforward process of obtaining a tourist visa for Egypt, in the hopes that it’ll be helpful for those of you considering a trip to see the Pyramids as well.
The Egypt e-Visa
The Egypt e-Visa is handled by Visa2Egypt, an official website of the Government of Egypt. You are required to apply for your e-Visa at least seven days before arriving in Egypt, and once a visa has been approved, passport control officials will be able to see it in their system.
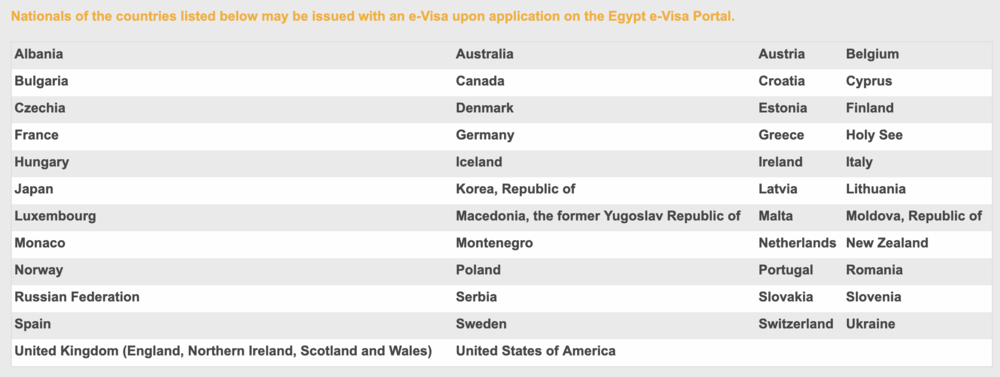
While this article is written from a Canadian perspective, citizens from any of the below countries are also eligible for the Egypt e-Visa process and so will be going through the same process:
Both single-entry and multiple-entry visas are available, and the fee schedule is as below (listed in US dollars):

The Application
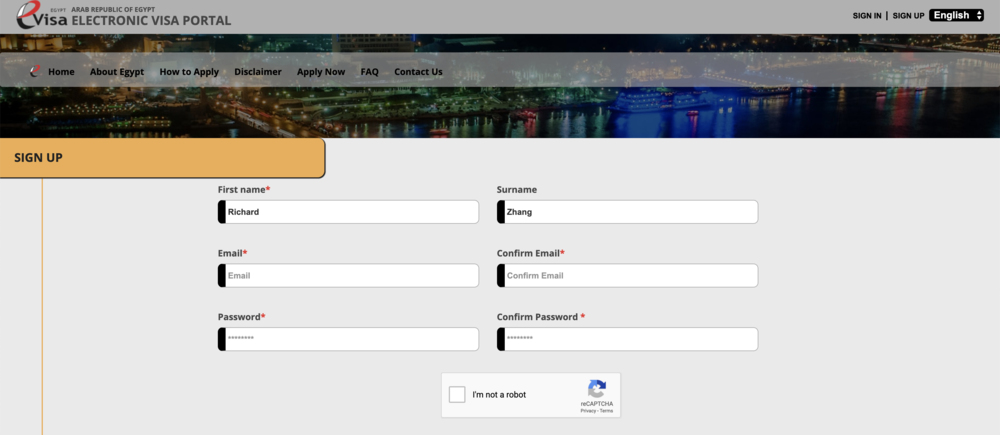
You have to create an account on the Visa2Egypt website in order to initiate an e-Visa application. One individual can apply on behalf of everyone in your travelling party, so only one online account is required.
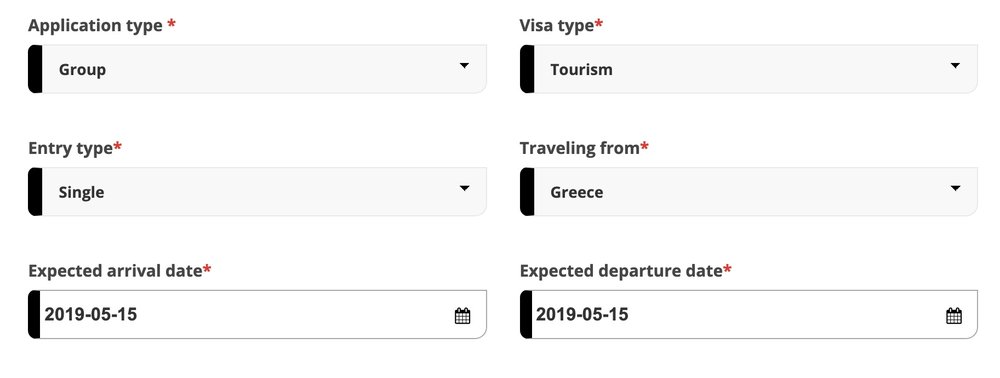
Once you’ve created and confirmed your account, click the “Apply Now” button to begin your visa application. If you’re applying for yourself only, choose “Single” as the Application Type; otherwise, if you’re applying for yourself and others, choose “Group”.

The first page of the application process also asks for your expected arrival and departure dates, and the place from which you will be travelling to Egypt. It’s my understanding that the arrival and departure dates are used to determine the duration and validity period of your visa.
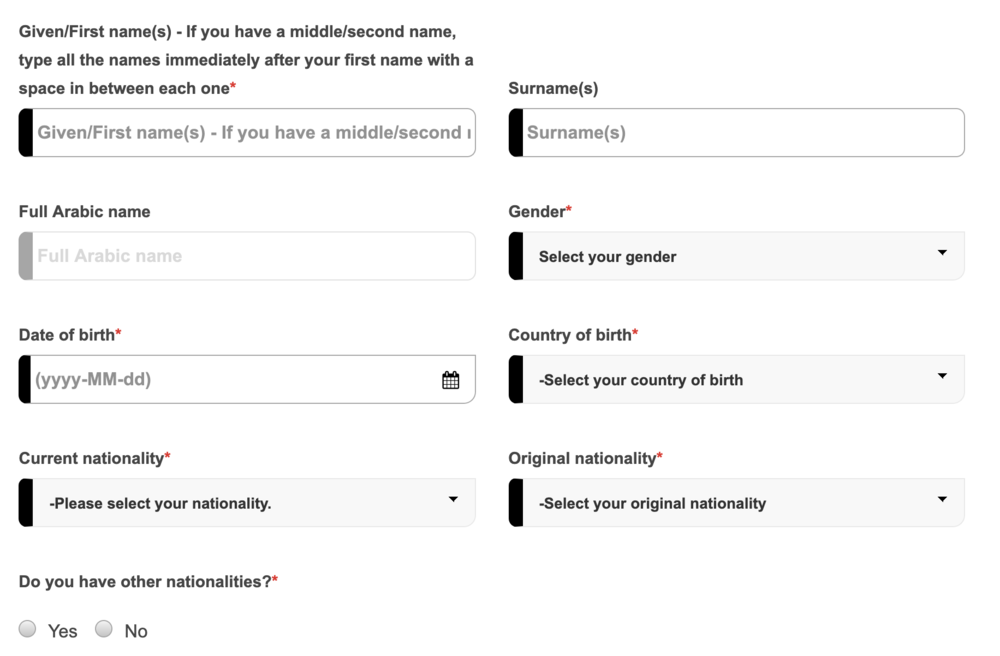
The next page of the application asks you for most of the important bits of information you’d expect on a visa application: name, marital status, nationality, passport details, contact info, etc.
The only somewhat unexpected questions were the ones asking about your occupation and the one asking whether you’ve ever been deported from Egypt or any other country before (hopefully you’ll be answering “No”).

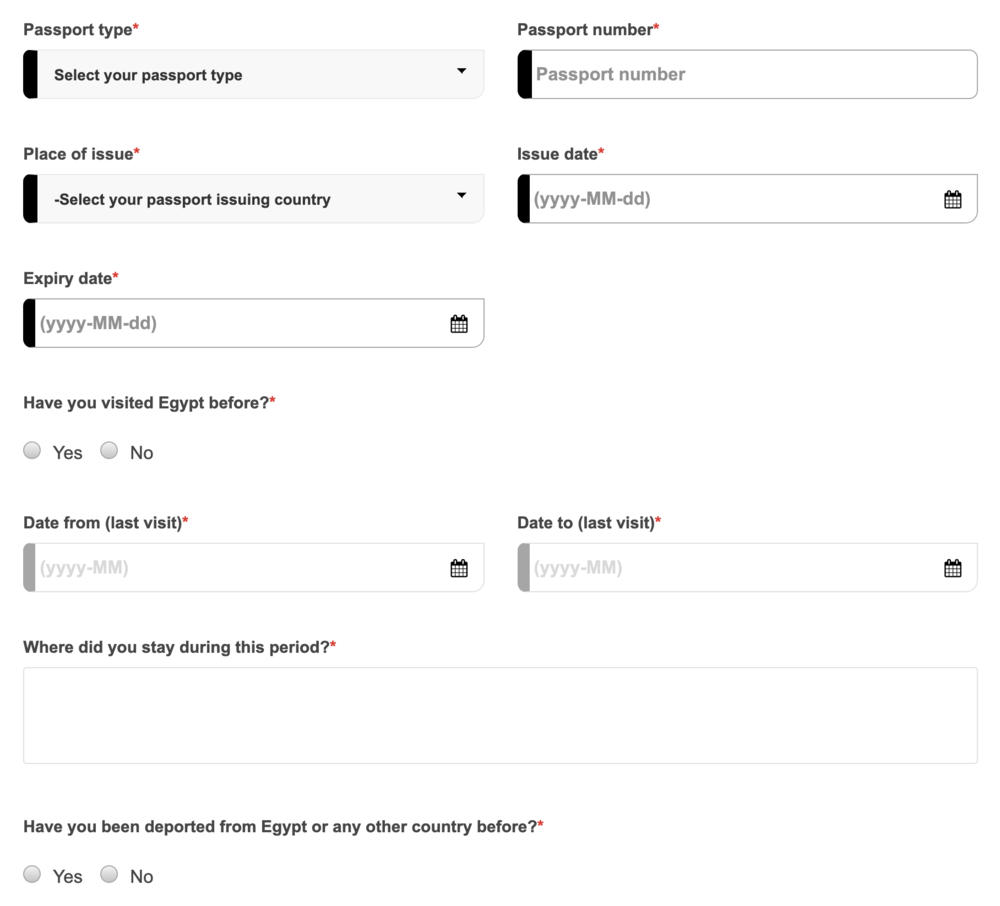
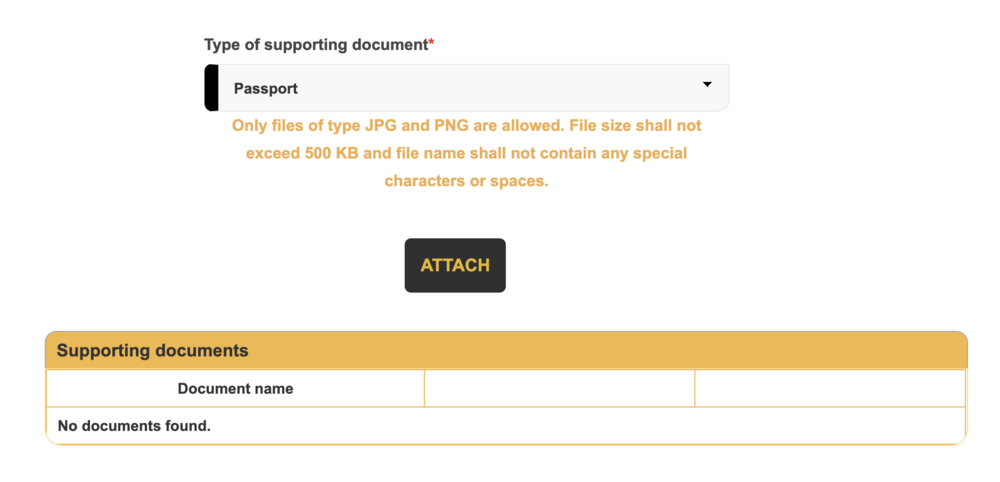
The bottom of this page includes a field to submit a scan of your passport’s information page. Like most frequent travellers, I tend to have my passport scan saved on my laptop for easy access, so this was pretty straightforward. Only JPG or PNG image files are accepted, so if you have a PDF you’ll need to run an online converter on it first.
Unlike most visa applications I’ve done, the Egypt e-Visa does not require applicants to submit a photo of themselves.
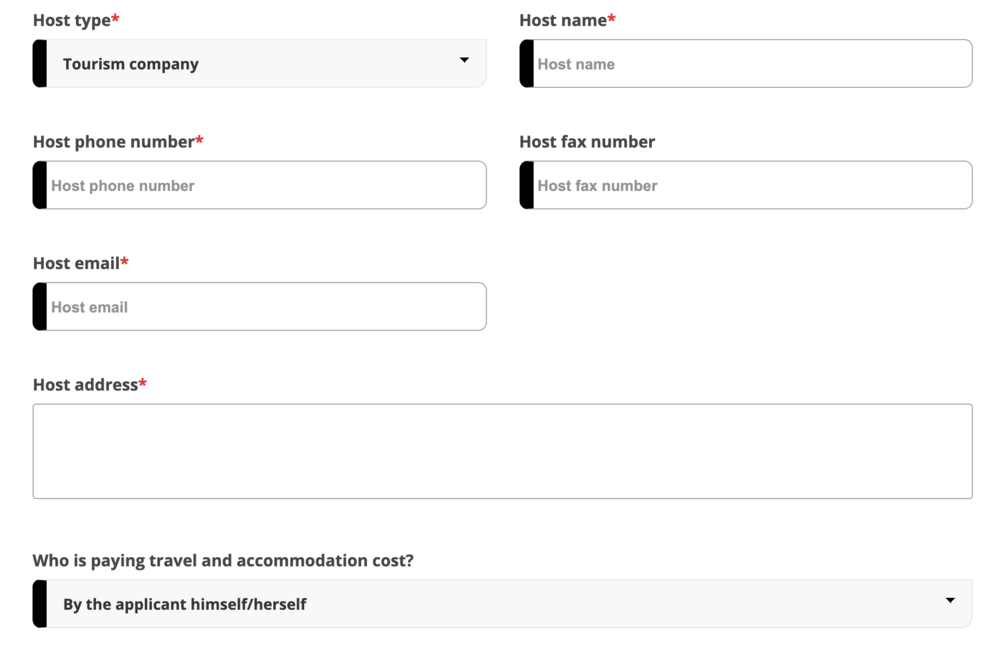
The third and last page of the application asks for information about the host for your stay in Egypt. If you’re staying at a hotel, you’ll simply fill in the hotel’s information here. I had chosen the Le Méridien Cairo Airport for my 16-hour stay in Egypt, so I just grabbed all the details straight from the hotel’s website.
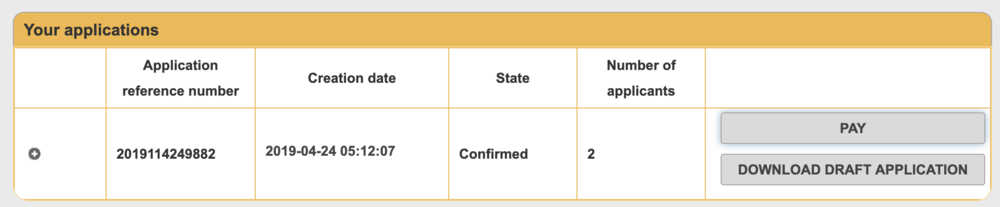
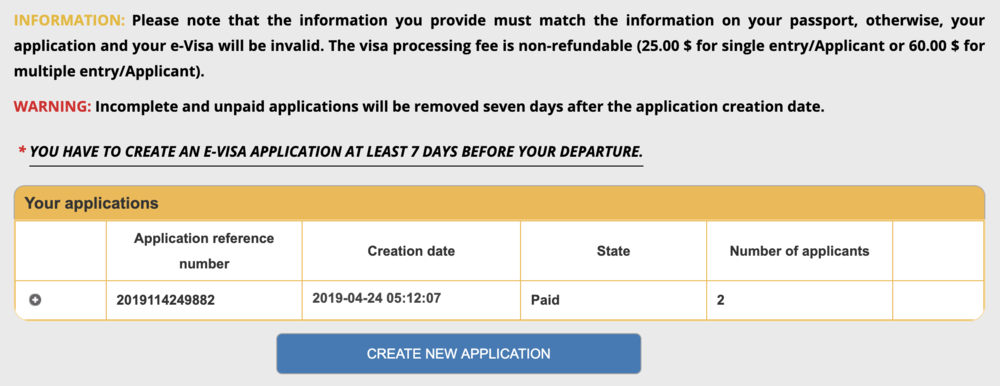
After you’ve completed the above for all members of your travelling party, you’ll have an e-Visa application with a “Confirmed” status. Now you just need to pay.
The Visa2Egypt website accepts online payment using Visa or MasterCard. Since the charge will be in US dollars, I opted to use one of my US credit cards to pay for the visa application fee. You could also choose to use a Canadian credit card with no foreign transaction fees.
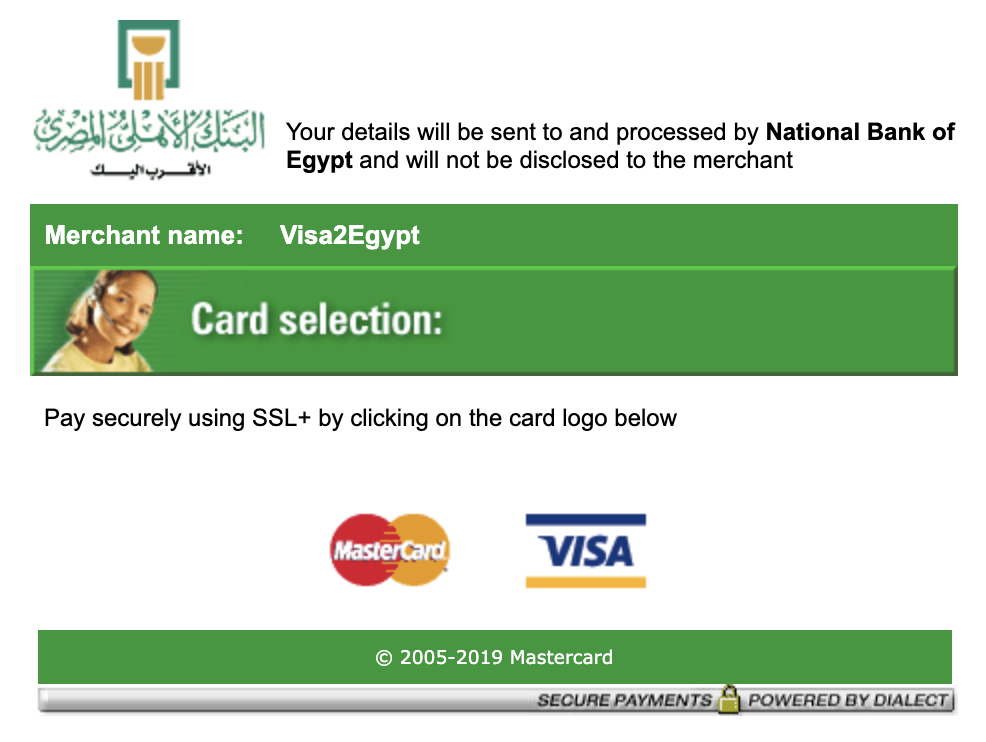
I first tried paying with a Visa, but it kept getting declined…
…so I switched to a MasterCard instead, which went through successfully on the first try.
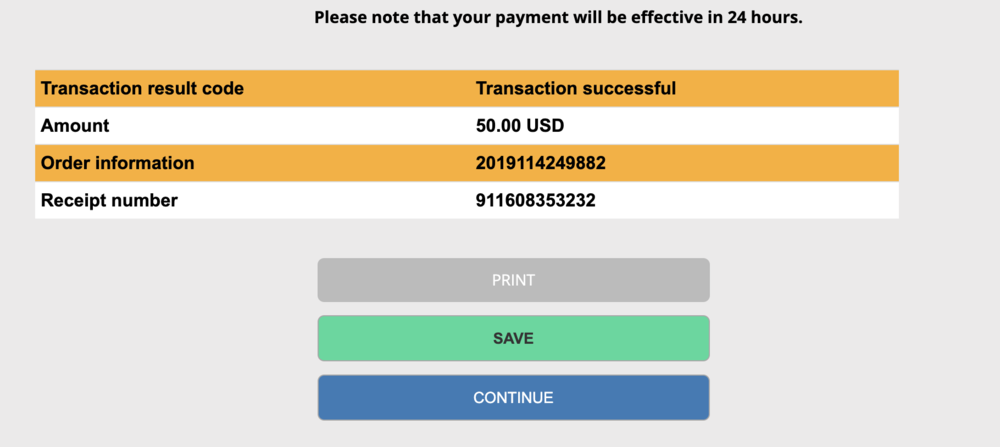
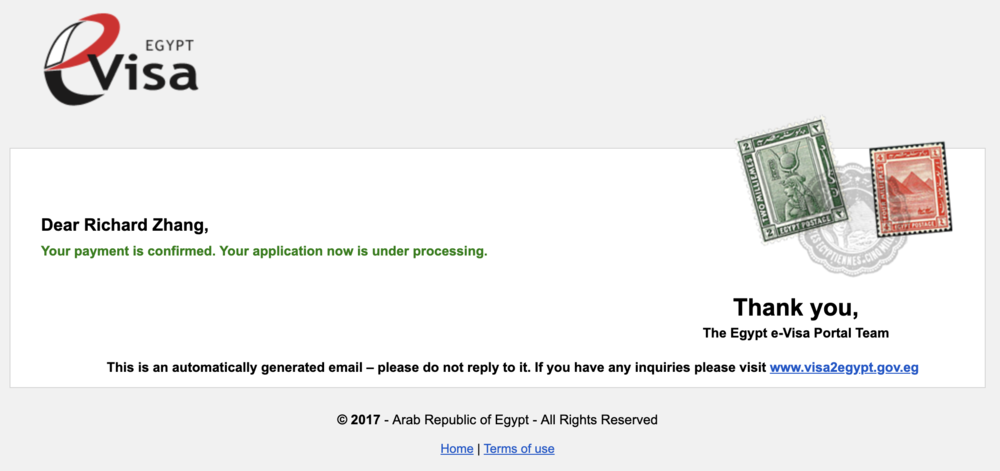
The application status then showed up as “Paid”, and I received a confirmation email about my payment.
The turnaround on the visa application was incredibly quick. I received my approved e-Visa on the same day:
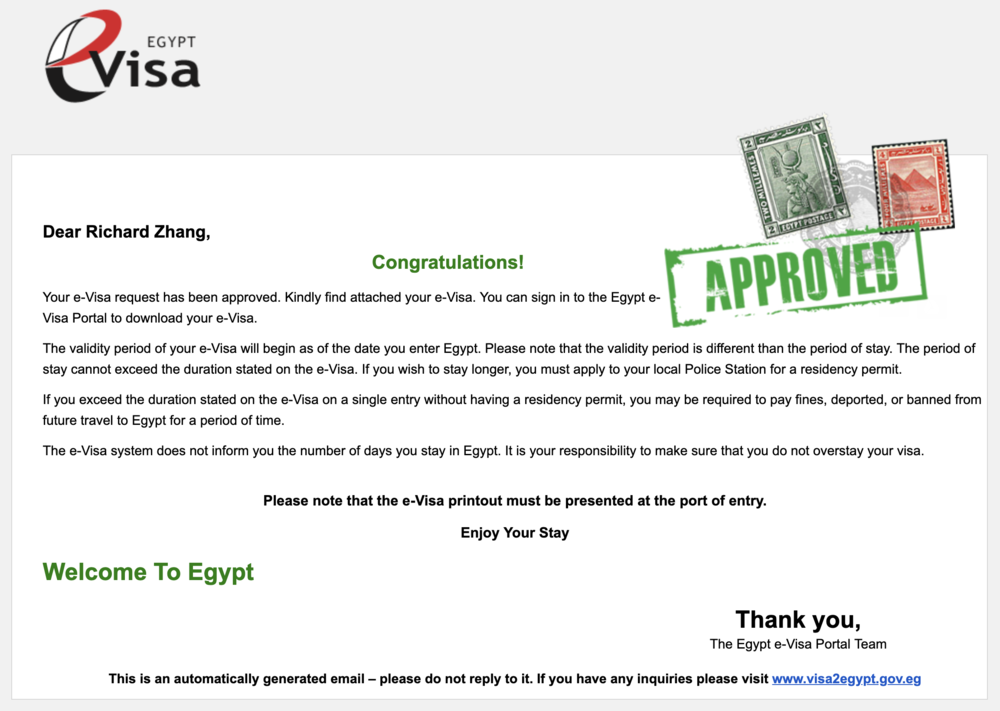
The visa itself was included as an attachment on the email, and I printed it out to bring with me upon arrival in Egypt.
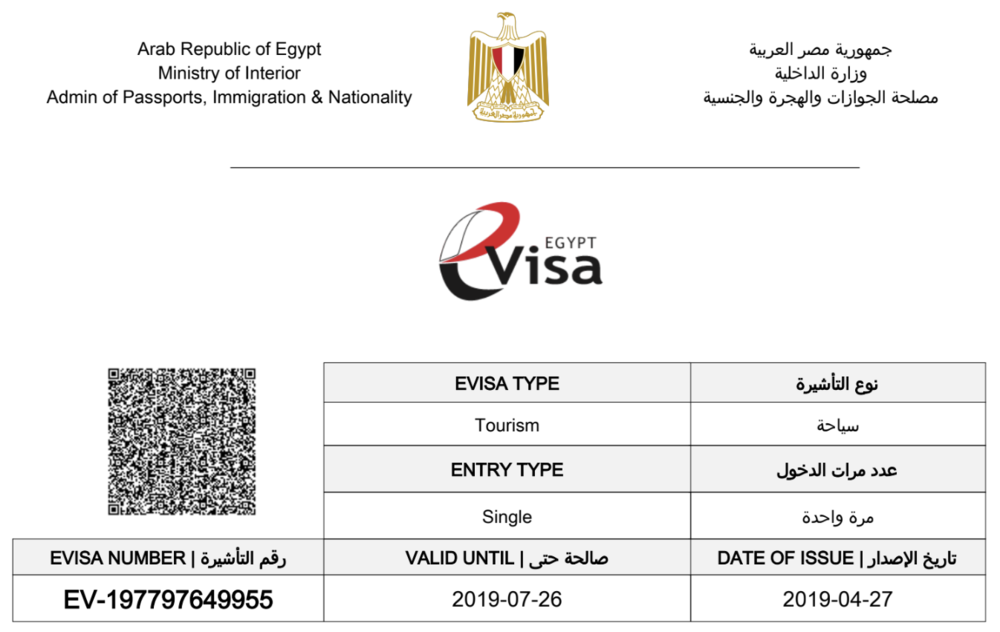
I was issued a single-entry visa with three months’ validity; while I can’t be 100% certain of this, I’d assume that three months is the standard validity for single-entry visas, while longer visas might be issued for multiple-entry ones, depending on your specified arrival and departure dates.
Conclusion
The Egypt e-Visa application process couldn’t be much more straightforward, and you can easily get it done in a few minutes’ time. The Visa2Egypt website is intuitive and easy to use, and the turnaround time of only a few hours was pretty impressive; nevertheless, it’s still a good idea to follow the guidelines and get your visa sorted out at least a week before your arrival in Egypt.
While the US$25 visa fee added another expense to my 16-hour layover in Egypt, I considered it a small price to pay to check one of the seven ancient wonders off my bucket list.


First-year value
$336
Monthly fee: $15.99
• Earn 1,250 points per month upon spending $750 per month for 12 months


Member Discussion